Back to article
3348
Setting up your product
Learn how to set up your product, connect components and enjoy the benefits of all its features.
To set up the Videobar VB1:
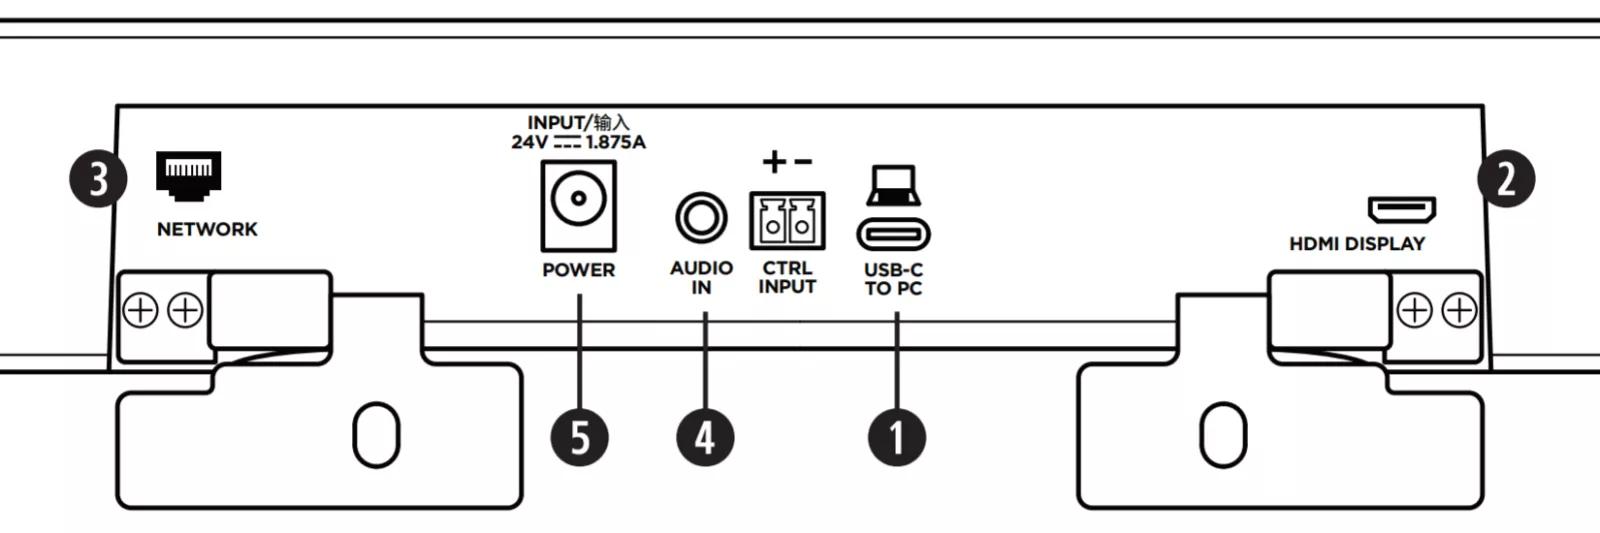
- On the back of the videobar, connect the USB-C cable (included) to the USB-C to PC port. Leave the other end of this cable accessible for meeting hosts so they can easily connect their computer. If a computer hosting a meeting does not have a USB-C port, attach the USB C-to-A adapter (included) to the computer end of the USB-C cable.
- To present video from the host computer to a video display or monitor, connect the HDMI cable (included) to the HDMI Display port of the videobar to an HDMI port on a video display or monitor. The host computer must have the latest DisplayLink® driver installed (available at displaylink.com/downloads) and the videobar must have its DisplayLink setting enabled for the HDMI output to function. For more information, see Enabling or disabling the DisplayLink® / HDMI Output. An ARC-enabled HDMI connection is not required as ARC is not supported.
- To use a wired network connection, connect an Ethernet cable (not included) between the Network port on the videobar and a network connection in the room (e.g. a network access point, LAN port, a network switch/router, etc.).
- To play sound from a device with an analog audio output, connect a 3.5 mm stereo cable (not included) to the Audio In jack on the back of the videobar. The connection type at the other end of the cable depends on the device being connected. The audio from this input will play simutaneously with the devices connected via USB and/or Bluetooth. This input is not for use with microphone-level audio signais.
- Connect the Bose power supply (included) to the Power input.
- Use the power cable (included) to connect the power supply to a power outlet. The VB1 will power on automatically when connected to a power source.
Was this article helpful?
Thank you for your feedback!